Message Center Complete User Guide
Complete User Guide Sections
1.1 Overview
The KeyNavigator Message Center is designed to provide you with account activity and transaction alerts, when and how you need them. You can choose to receive Alerts via email or via SMS/Text message.
You can choose to receive some alerts by email and others via SMS/Text message. You can even choose to receive Alerts (i.e. high priority alerts) via both email and SMS/Text message. You can configure each Alert individually.
You also have the ability to set “quiet times” for SMS/Text messages as well as suspend both email and SMS/Text messages when you are out of the office. Alerts are always retained in Message History for you to view upon your return or when your designated quiet time ends.
1.2 Alert Catalog
The KeyNavigator Message Center currently has three categories (types) of alerts.
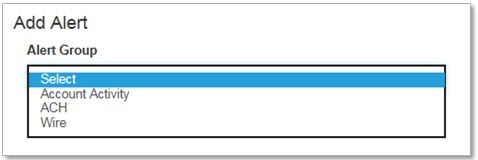
Account Activity:
- Available Balance
- Book Transfer Completed
- Check Returned Due to Insufficient Funds
- Deposit Completed
- Intraday Credit Detail Available
- Intraday Detail Available
- Opening Available Balance
- Stop Payment Expiring
- Stop Payment Placed
ACH:
- Customer Activity Report (CAR) Available for Review
- ACH Exposure
- ACH Return Item Posted
- Incoming ACH Received
Wire:
- Incoming Wire Received
- Outgoing Wire Requires Authorization
- Outgoing Wire Sent
- Outgoing Wire Voided
- Pre-Cutoff – Wires Requiring Authorization
2.1 Create Customized Alerts
- Available to all Users – Any KeyNavigator user who is entitled to services that have alerts available will be able to create and edit alerts.
- Easy Alert Setup – A simple step by step process allows easy configuration of each alert subscription.
- Choose Alert Delivery Method – Chose to receive alerts in real time (i.e. within approximately 15 minutes of event occurring) or schedule alert delivery for certain times throughout the day.
- Customize Alerts – Set thresholds so that your alerts will only be triggered when those thresholds are met (e.g. incoming wire above $X dollars or when balance drops below $X dollars).
2.2 Manage Delivery
- Alternative Email – You can provide an alternative email address allowing for notifications to be sent to two separate email addresses. Your KeyNavigator enrolled email address is always your primary email for Alerts.
- Global Suspend – Suspend email alerts between selected dates while still being able to view them in your Alert History when you return.
- Choose Delivery Channel – Receive Alerts via email or SMS/Text. Or you can choose to receive some Alerts via email and others via SMS/Text.
2.3 View Alert History
- Comprehensive Message History – You can access all of the Alerts that have been sent to you via email and/or SMS/Text in the centralized Message History. Message History is essentially a copy of what was sent via any channel (email or Text) and it can be sorted and filtered various ways. Alerts will always be available in Message History even if Global Suspend has been enabled.
Access Message Center screens by clicking on the Message Center envelope link at the top of the KeyNavigator page:

3.1 Message History
The Message History page will display all Alert notifications (both email and SMS/Text) that have been sent to you based on the Alerts that you have subscribed to. You can filter the message history list by entering text in the field provided. You can also filter the message history list by using the date filter. Thirteen (13) months of history is provided on the Message History screen.
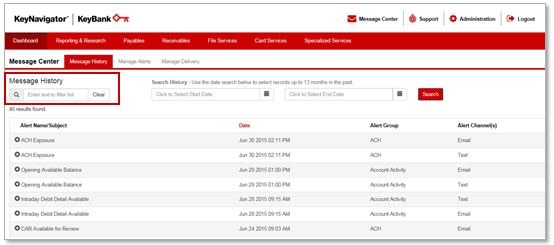
The following information is provided for each Alert:
- Alert Name/Subject (you can click on the + sign to expand the row in order to view Alert details)
- Date
- Alert Group
- Alert Channel(s)

3.2 Manage Alerts
The Manage Alerts page will display all of the Alerts that you have set up.
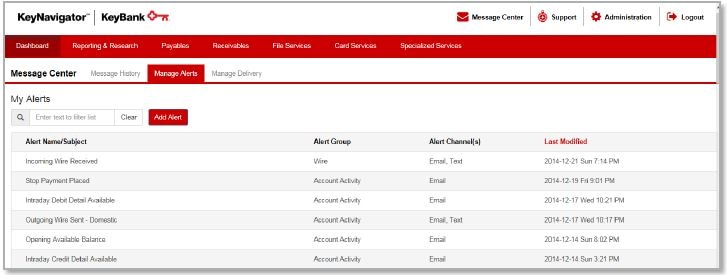
The following information is provided for each Alert:
- Alert Name/Subject
- Alert Group
- Alert Channel(s)
- Last Modified Date
Click on a specific Alert to view specific Alert details and all Alert customization settings such as the Alert’s nickname, accounts, dollar threshold, channel(s) and frequency. You can also edit or delete an existing Alert while viewing the Alert.
- To add a new Alert subscription, click on the Add Alert button.
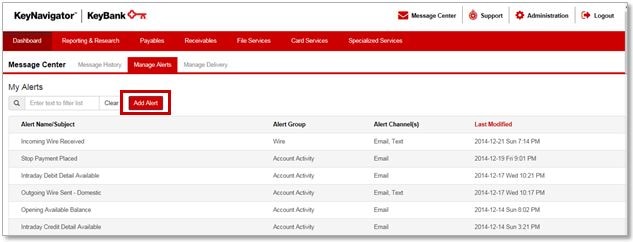
- Select the Alert Group.
- Select the Alert Type.

- Edit the default Alert Name/Subject if you desire.

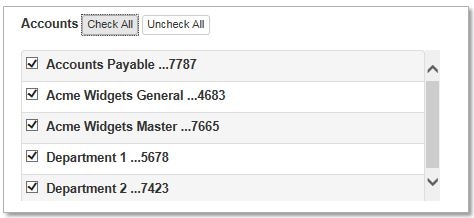
- Select the account(s) to be included in the Alert.
- Select a dollar threshold for your alert.

- Select the Alert Channel – email and/or Phone (Text)

NOTE: To receive an Alert via SMS/Text message you must first enable Phone (Text) Delivery on the Manage Delivery page. The Phone (Text) Delivery option will not be displayed until you complete the enrollment process to receive SMS/Text messages.
- Select the Alert Frequency (if available – note that some Alerts are only sent once per day at a designated time). Click the radio button to choose Immediately or At Selected Time.

3.3 Manage Delivery
The Manage Delivery page is where you add / edit various settings that control how and when Alerts are delivered to you.

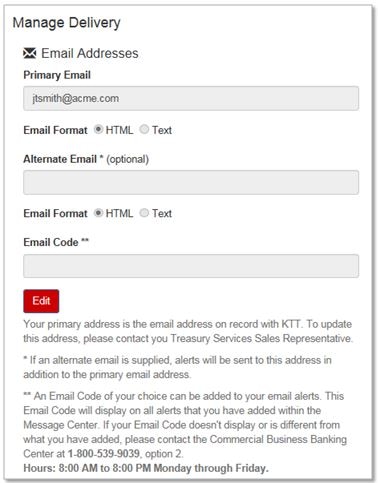
Address Details:
- Primary Email (defaults to your email address on record with KeyNavigator
- Email Format – HTML or Text
- Alternative Email – can be any secondary email address
- Email Code – enter a word that means something to you. This email code will display on all alerts that you have subscribed to in the Message Center.
Global Suspend:
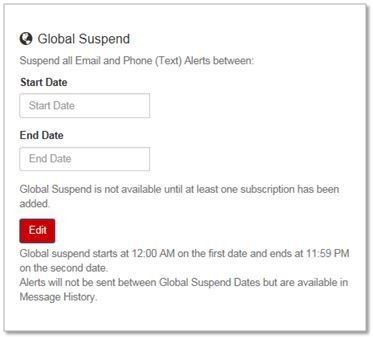
- Enter a Start and End Date for when Alerts should not be delivered
NOTE: Global Suspend begins at 12:00 a.m. on the start date and ends at 11:59 p.m. on the end date.
NOTE: Alerts will not be sent between the Global Suspend dates; instead they will always be available in your Message History.
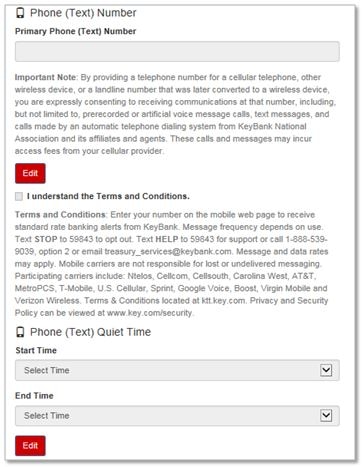
Phone (Text) Number:
- You must complete enrollment of SMS/Text message receipt on your mobile device before you can add SMS/Text as a delivery option to individual Alert subscriptions.
- Click “edit” and enter your mobile device phone number. Then click “save”
- Click on the checkbox after you have reviewed the Terms and Conditions
- Follow all instructions sent to you via SMS/Text on your device to complete the enrollment process.
- Select a Quiet Time to not receive Alerts via SMS/Text on your device.
NOTE: Alerts will not be sent to your mobile device if you set a Quiet Time. Once the quiet time has ended, all Alerts will be sent to your device as well as be displayed in Message History.
