ARP Translator Tool Complete User Guide
Complete User Guide Sections
The Translator Tool is available when you need assistance in retrieving your check issuance information from QuickBooks. Once created, the file can be uploaded via KeyNavigator to be used with Account Reconciliation services (ARP) and with Positive Pay. KeyNavigator access is needed.
2.1 Installing the Translator Tool
- Log into QuickBooks as the Administrator (or user with administrator rights).
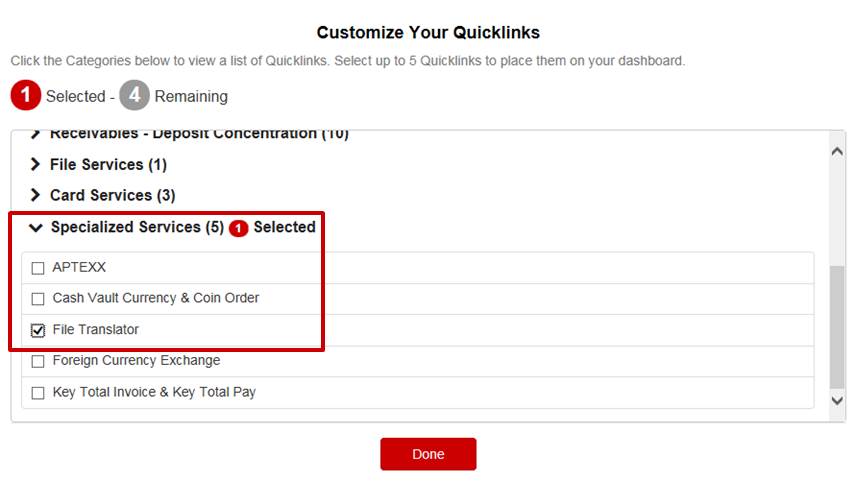
- Log into KeyNavigator, and click on the Gear icon in the Quicklinks section on the left side of the screen.

- On the Customize Your Quicklinks screen, scroll down to the Specialized Services section and select File Translator. Then click Done.
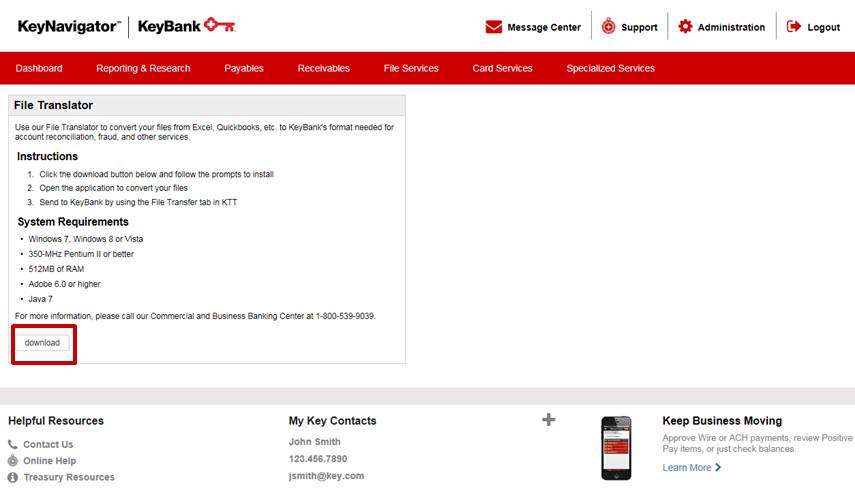
- Now you will see File Translator appear under the Quicklinks section. click the File Translator link.

- Click the Download button to launch the Save As or Run box. You can choose either.
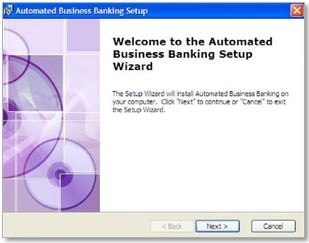
- The installation welcome screen appears. Click Next to continue or Cancel to stop the install.
- The End-User License Agreement screen provides the option to accept or not accept the terms in the license agreement. If you do not accept the terms, the install process will halt, and the system will not be installed.

- Select the I accept the terms in the License Agreement option.
- Click Next to continue.
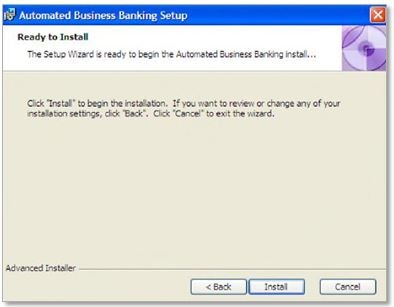
- The Ready To Install screen provides you with the opportunity to click Back to review your settings. Click Install to continue. You may click Cancel to halt the installation.
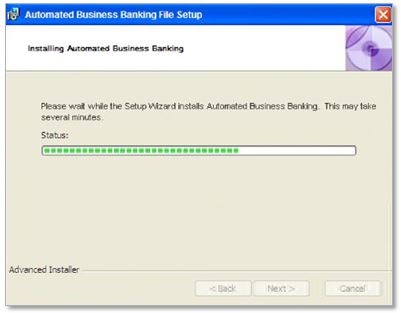
- A status screen allows you to monitor the installation progress.
- The system displays a screen notifying you that the installation is complete.

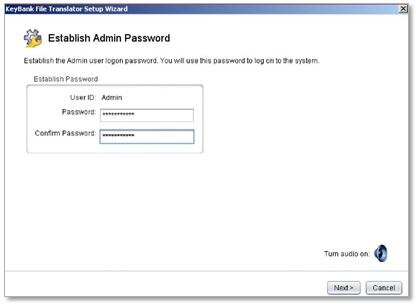
- The following screen is where you can establish a password for the admin user. This can be changed at a later date if the user wishes.
The password must be 8-12 characters long and contain at least 2 numerical digits.
- Next, choose either Payee Positive Pay or Standard Positive Pay.
This cannot be changed without uninstalling or reinstalling the Translator Tool.

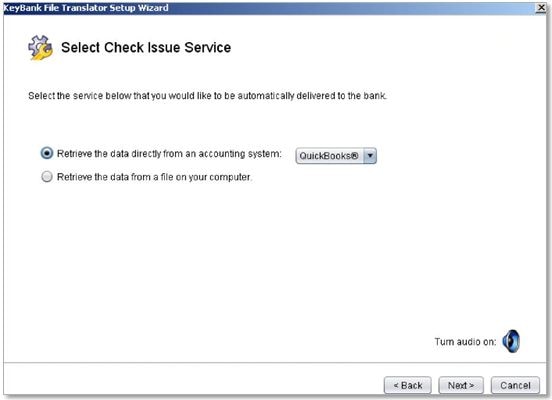
Choose the first option Retrieve the data directly from an account system: QuickBooks and click Next.
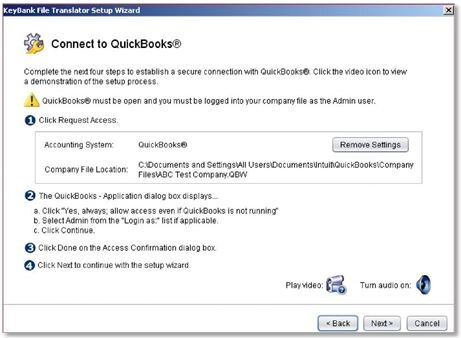
- Click on Request Access. The system will ask if you want to allow the ARP Translator Tool to access QuickBooks, even if QuickBooks is not running. Click Yes and Continue. This will put a certificate into QuickBooks that will allow the ARP Translator Tool access to the check register even if QuickBooks is not running.
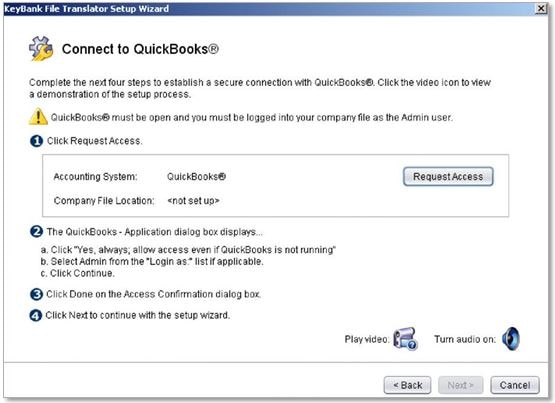
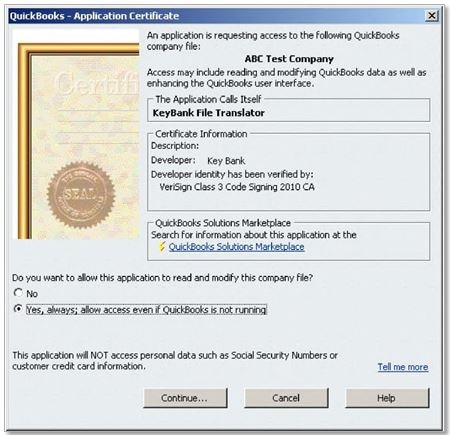
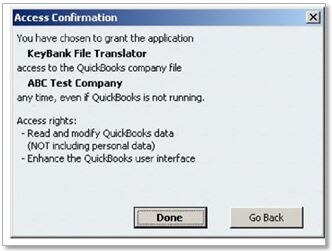
- You will be prompted to select a user to access QuickBooks, choose the user that has admin rights (most likely the person who is installing the tool.) An Access Confirmation window will open confirming that the changes were made. Click Done to proceed.
- Once this is complete the following screen will appear with the Company File Location. Click Next.
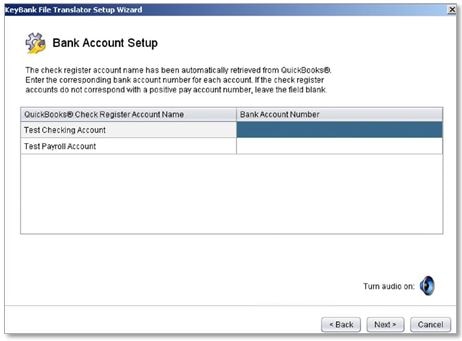
- Enter in the bank account number that corresponds to the account(s) to which Positive Pay service is being added. Click Next.
You do not need to enter information for accounts not being added to Positive Pay.
- Next choose Export as the File Delivery Method and click Next.
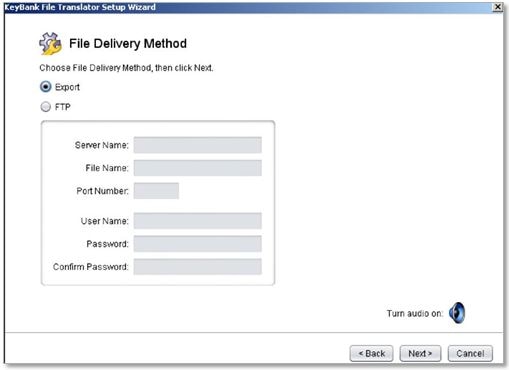
- Now the File Translator Set-up is Complete. Click Finish.
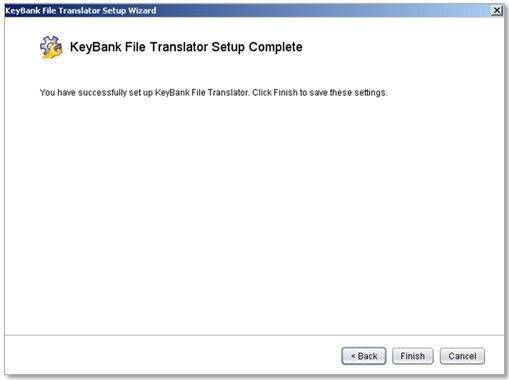
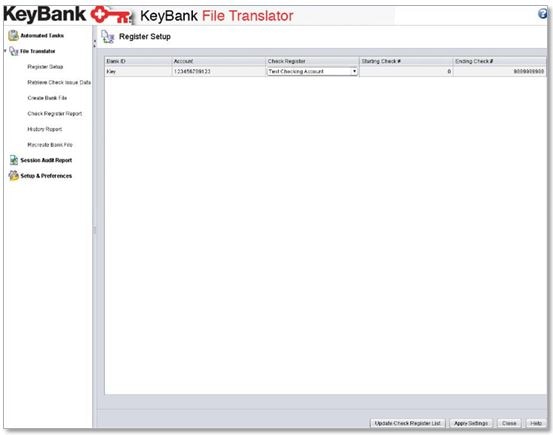
- At the main page, click on the arrow next to File Translator to collapse the menu.
- Now choose the Register Setup to view the accounts set-up in the ARP Translator Tool. If you want you can assign starting and ending check numbers here.
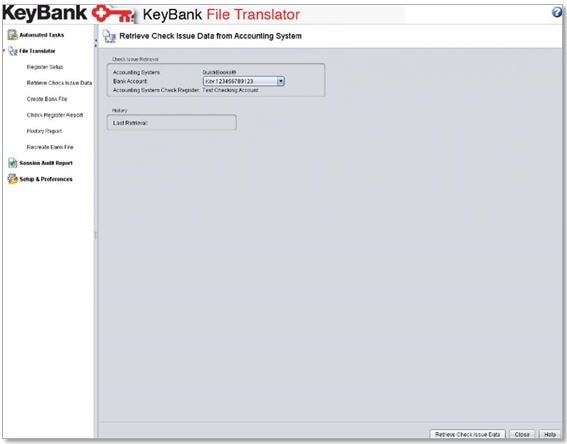
- Click on Retrieve Check Issue Data to import checks from the QuickBooks Check Register. You can choose the account to import data from, using the drop down menu. Also shown is the last retrieval date/time for each account. Click on Retrieve Check Issue Data at the bottom when ready.
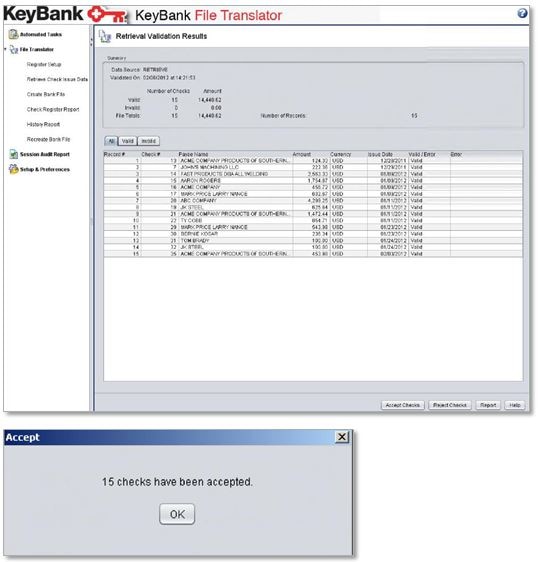
- Once the data is pulled, the Retrieval Validation Results screen will display all the data that has been pulled in from QuickBooks. At the top is a summary of valid and invalid checks, as well as a file total in dollars and number of checks. Clicking on the Reject Checks button at the bottom will remove the records from the Translator Tool and you can import the data again when ready. This is helpful if you need to narrow down the check range. When ready, choose Accept Checks and the number of checks that have been accepted will be displayed.
Once data has been accepted into the tool it cannot be deleted without uninstalling and reinstalling the tool.
- The Create Bank File screen displays everything that has been accepted into the tool and will be exported in the file. Click on Browse at the bottom to choose a location to save the file.
This is the file that will be sent to Key and a file extension is NOT required. It is recommended that the file include a Date as part of the file name. Once you have entered a name click OK.
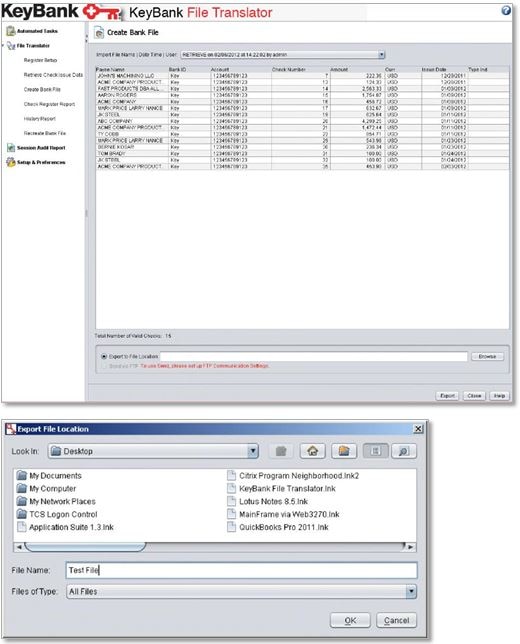
- After a location and name have been chosen, click on Export at the bottom to create the file in Key’s format. A window will display with File Created followed by the name of the file. Click OK to go back to the ARP File Translator screen. The Positive Pay file that was exported is ready to be sent to Key.

2.3 Troubleshooting
Q: What if I forgot my password and I am locked out?
There are four user IDs available in the translator tool:
- Admin
- User1
- User2
- User3
When you install the Translator Tool on your computer, you are prompted to set a password for the admin ID. If you forget your admin ID, password, or get locked out, you log on from another ID to reset your admin password.
Steps to reset your password for the admin user ID
- Log on to the Key File Translator tool under a different ID.
- Enter the password. If this is the first time using this ID, the password will be the same as the user ID.
- Click the Log-on button.
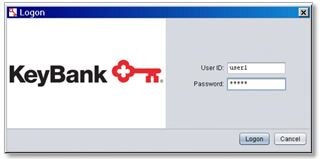
- You will be prompt to create another password for this ID.

- Select Setup & Preferences.
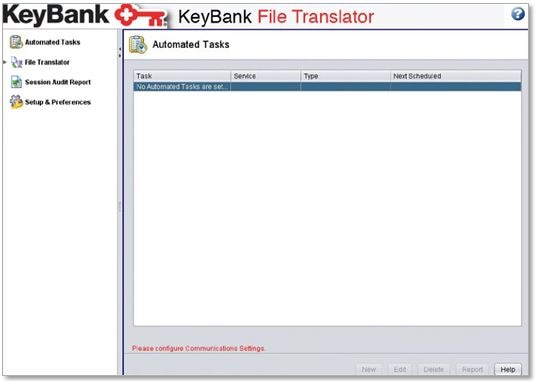
- Under Passwords tab, the user ID should be admin.
- Enter a new password for your admin ID.
- Click the Reset button.
- You will see a message Password has been updated.
- Click the Close button.
Q: If I upgrade or reinstall Quickbooks, how do I set up the Translator Tool?
- You can set up the tool to work with your new company profile without uninstalling and reinstalling.
- Make sure you are logged into Quickbooks as the Admin in single user mode.
- Log into the translator tool, click on Setup & Preferences on the left hand side, then the Accounting System Integration tab.
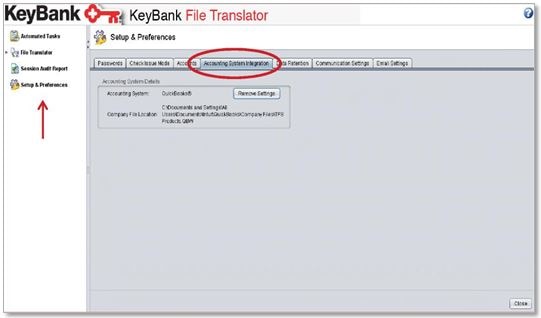
- Click on Remove Settings to delete the mapping to the old company profile. You will receive a pop up asking you to confirm the changes, click Yes to continue.

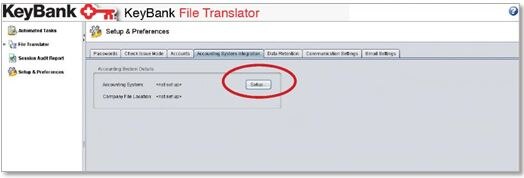
- Now that the old mapping is removed, click on Setup.
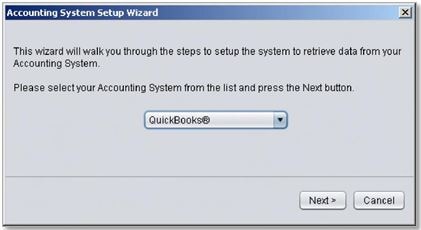
- Click Next on the first pop up box.
- Then click on Request Access.
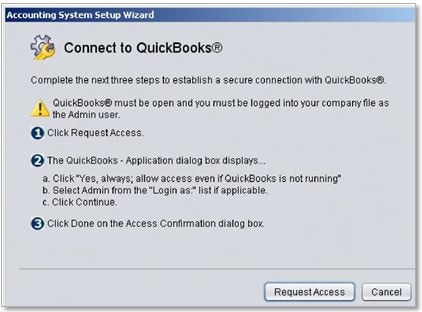
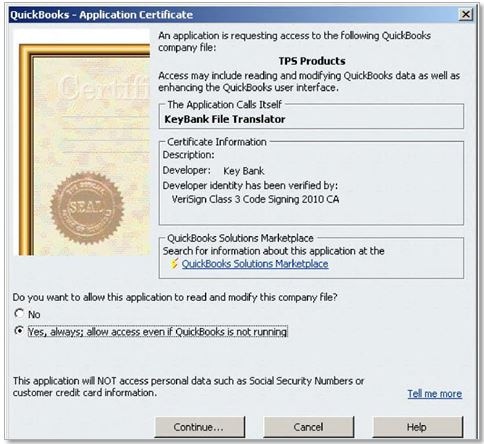
- A certificate will pop up and you need to click the second radial button Yes, always allow access even if Quickbooks is not running then Continue.
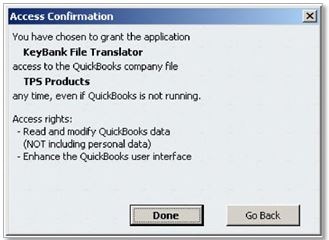
- This is your confirmation that the settings have been applied successfully. Click Done.
- You can click on the Accounting System Integration tab again to confirm the company file location is correct.
If this is not correct then sign into the correct company profile and repeat the steps above.
- Now you must assign the correct check register to the account along with check numbers. Double click File Translator in bold on the left to expand the menu then Register Setup.
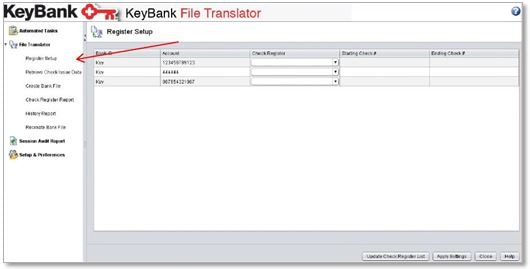
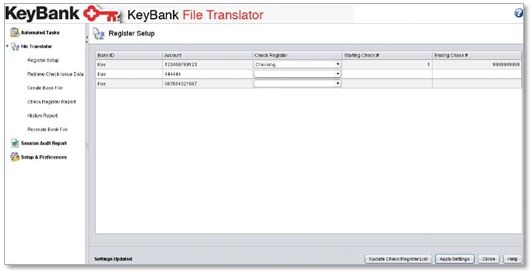
- At the bottom click Update Check Register List then choose the appropriate check register name from the drop down list that corresponds to that account number.

- Assign a starting and ending check number by double clicking in the text box.
You can use 1 and 9999999999 as starting and ending.
- Click Apply Settings at the bottom then Retrieve Check Issue Data and proceed as normal.
The Translator Tool is available when you need assistance in retrieving your check issuance information from your accounting package. Once created, the file can be uploaded via KeyNavigator to be used with Account Reconciliation services (ARP) and with Positive Pay. KeyNavigator access is needed.
4.1 Installing the Translator Tool
- Log into KeyNavigator, and click on the File Translator Quicklink on the left side of the screen.

- Click the Download button to launch the Save As or Run box. You can choose either.

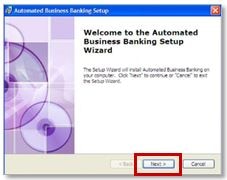
The installation welcome screen provides you with the Cancel button to stop the install.
- Click Next to continue.
- The End-User License Agreement screen provides the option to accept or not accept the terms in the license agreement. If you do not accept the terms, the install process will halt, and the system will not be installed.
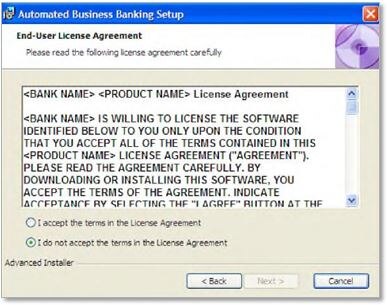
- Select the I accept the terms in the License Agreement option.
- Click Next to continue.
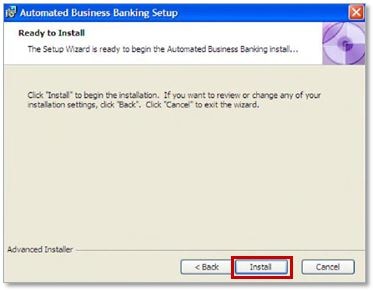
The Ready To Install screen provides you with the opportunity to click Back to review your settings. You may click Cancel to halt the installation. - Click Install to continue.
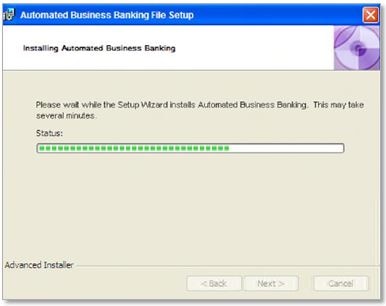
- A status screen allows you to monitor the installation progress.
- The system displays a screen notifying you that the installation is complete.
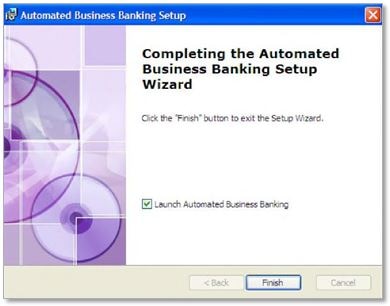
- The following screen is where you can establish a password for the admin user. This can be changed at a later date if needed.
The password must be 8-12 characters long and contain at least 2 numerical digits.

- Next, choose either Payee Positive Pay or Standard Positive Pay.
This cannot be changed without uninstalling or reinstalling the Translator Tool.

- Choose Retrieve the Data from a file on your computer.
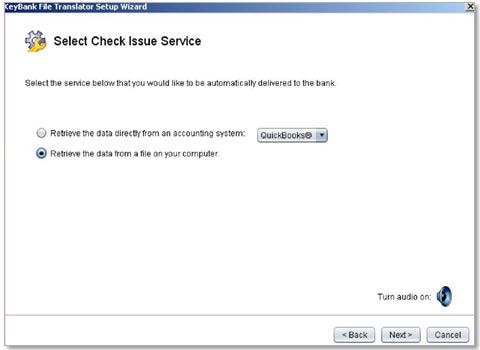
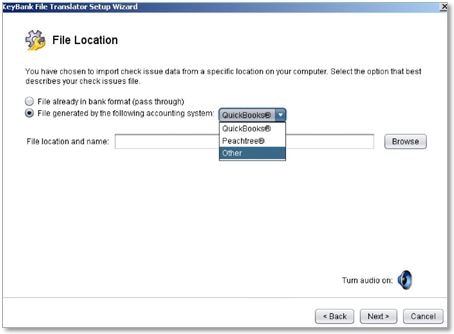
- Select the second option, and choose Other from the drop down menu unless you are exporting a file from QuickBooks. QuickBooks users should refer to the QuickBooks version of the translator tool guide. If you are exporting a file from Peachtree, choose Other from the drop down menu even though Peachtree is a specific option.
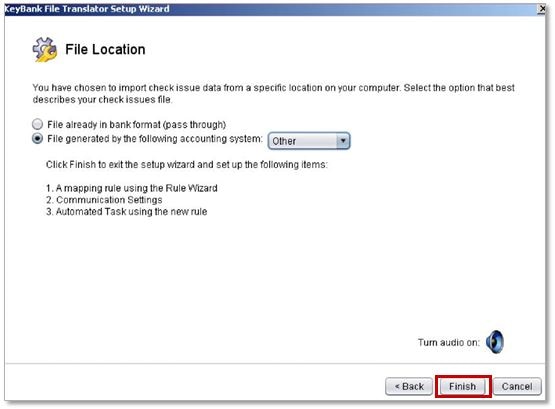
- Click Finish. This will complete the initial set-up and launch the ARP Translator Tool.
4.2 Set-up and Preferences
- This is the set-up and preferences menu of the ARP File Translator Tool. Click on the Accounts Tab which allows you to add accounts to the tool. You must include an account number and account name.
When using QuickBooks and Peachtree default rules, the account name has to match what is in the file. This also applies to all rules whose settings look for an account name in the file.
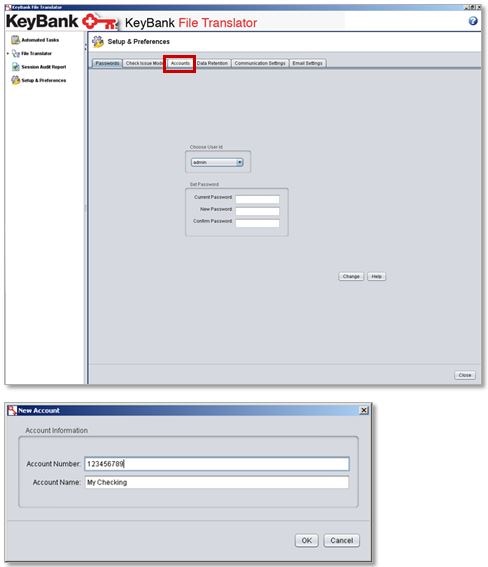
- Click on OK to add the desired account(s).
- Next, click on the arrow next to File Translator which will collapse the menu.
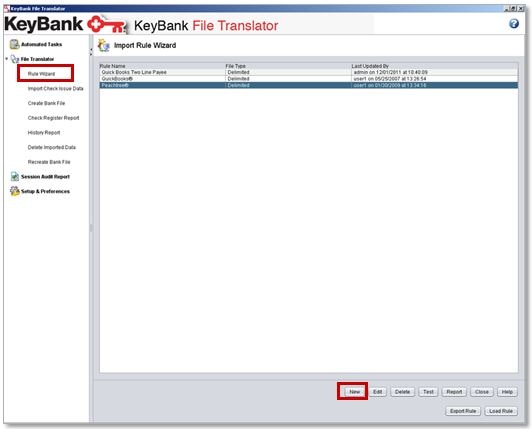
- Clicking on the Rule Wizard will display the available rules and allow you to create, export load, edit, and test and view the different rules. There are 2 available by default. QuickBooks and Peachtree are 1 line Payee Name rules and cannot be deleted. To create a new rule, click New.
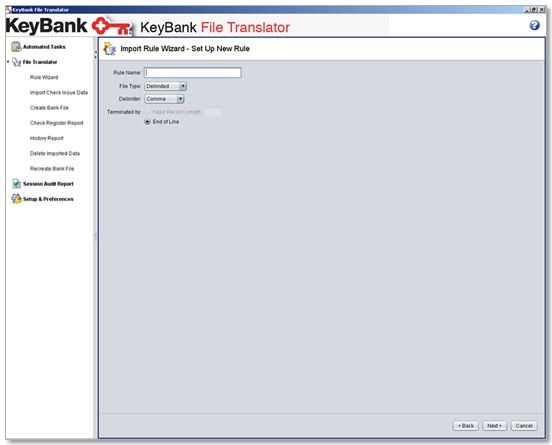
- The first screen allows you to name a rule, choose a file type, delimiter and terminated by. The rule name can be anything you want to name it. The file type delimited denotes that a comma or semicolon separates each field. The fixed format allows you to create a rule based on a fixed width format. This is useful if you have a text file that is one length, i.e. the data runs together. This example is of a comma delimited or CSV file which is the most common.
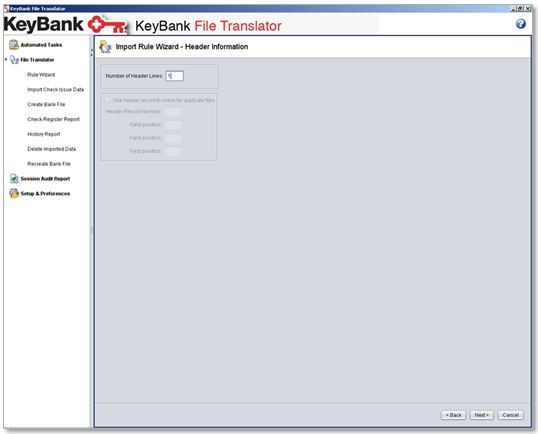
- The following is where you define whether the file has a header, and if so, what to do with it. If there is a header, and you want to use it to check for duplicates, then choose Yes, setup header record rules. If the Excel file has a head, but you want to ignore it, choose Yes, but ignore the header on import. If there is not a header, choose No Header.

- If you are establishing header rules, first, define how many header lines there are and then indicate which positions in the header record will check for duplicate files. To ignore the header records, simply indicate how many lines there are.
- After choosing No Header, or entering in the lines of headers, you will choose if there are check totals in the file. The check totals will appear at the bottom of the file and will sum the individual checks. Choosing No Totals, or Yes, but ignore totals will take you to Step 10. If you are going to set up Totals rules, click Next.
- Next you will define where and how to validate record counts. This will be in the trailer of the file. You will have to choose which position it is in. Enter the data, and choose Next.

- Click the drop down menu to choose the account you wish to use. If you established a header rule earlier, you can set the rule to validate the account number in the header. Once you have the account number added, click Next.

- Next, define where the Translator Tool will look for the dollar amount in the Excel file, and whether or not it has a decimal in it. Below, define the date field and which format it is in. For example: 12/06/2011 or 12/06/11 from the drop down menu.
The field positions are based on which columns that data is in when using a CSV file. Column A is field position 1, Column B is field 2, Column C is field 3, etc.

- Fill in the check number position and the payee name field position. If this is Standard Positive Pay, the payee name field will not display.

- The Text Field Position is the optional data field. The Type Indicator is used for void items. Click on Map to define the field and what tool you should look for to determine if it is a void or not.
You have to define a void field and an issue field if you are going to use this feature. The void column cannot contain a blank space or it will fail to upload the checks.

- Click on Next, then Finish to complete the Rule Wizard. This will take you back to the main screen, and your new rule will be visible.

4.3 Using the Translator Tool
- Once the rule is created, you click on Import Check Issue Data to import a file with a rule. Browse to find the file that was exported out of the accounting software to import into the tool. Clicking on the file once will select it. Next, choose the Import Rule. Click Import.

- After the tool examines the file, the File Validation Results screen will appear. This is the summary of everything that the file contained. The valid/error column should display valid for all of the items listed. If not, it will give a reason in the Error Column. Double clicking on any record will open a detail window, and any errors will be displayed next to the field that contains the error. Once you have reviewed the file, and are ready to accept the checks, click on Accept File. If there are errors that need to be corrected, such as incorrect date format, click Reject File.
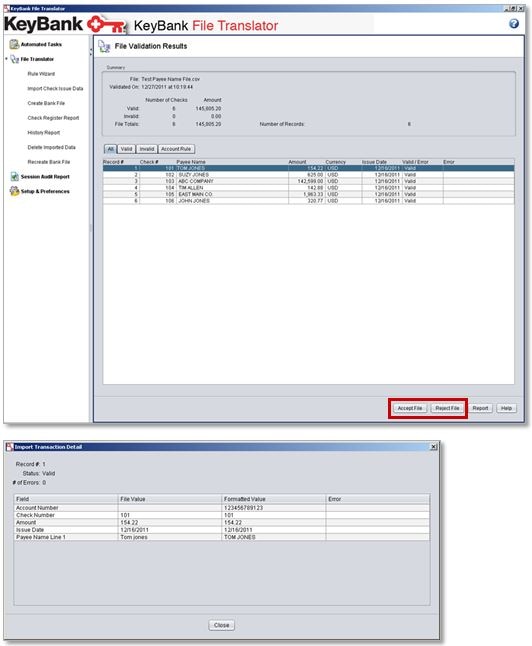
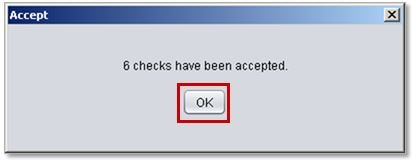
- After accepting the checks, a window will pop up to let you know how many checks were accepted. Click OK to take you to the Create Bank File screen.
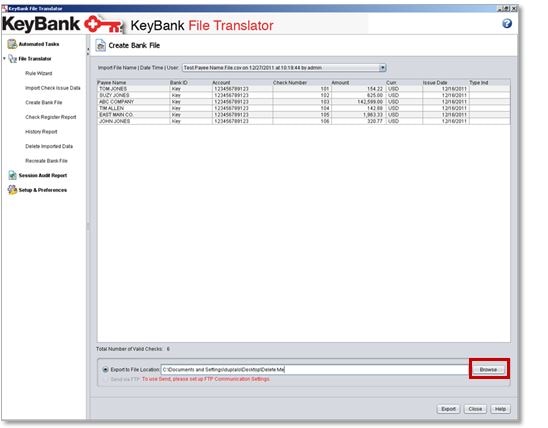
- The Create Bank File screen is where you will export the file to a specific directory to be sent to Key. The file that is exported is a text file. Choose Browse and save the file to a directory on the computer that is easily accessible. It is recommended to name the file with the date in the file name.
Once you click Export, you cannot delete the data from the system. The only way to clear the data is to uninstall and reinstall the tool.
- Once the file is exported, you can close the translator tool and send the file to Key.
4.4 Troubleshooting
Q: What if I forgot my password and I am locked out?
There are four user IDs available in the translator tool:
- Admin
- User1
- User2
- User3
When you install the translator tool on your computer, you are prompted to set a password for the admin ID. If you forget your admin ID, password, or get locked out, you can log on with a different user ID to reset your admin password.
Steps to reset your password for the admin user ID.
- Log on to the Key File Translator tool under a different ID.
- Enter the password. If this is the first time using this ID, the password will be the same as the user ID
- Click the Logon button.
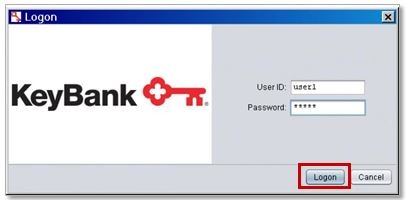
- You will be prompted to create another password for this ID.

- Select Setup & Preferences.

- Under Passwords tab, the user ID should be admin.
- Enter a new password for your admin ID.
- Click the Reset button.
- You will see a message Password has been updated.
- Click the Close button.